
Sod Installation
When it comes to establishing a beautiful and lush lawn, there are several options. One popular choice is sod, which involves installing pre-grown grass onto your property. Sod offers numerous benefits and can transform your landscape in a short amount of time.
What is Sod
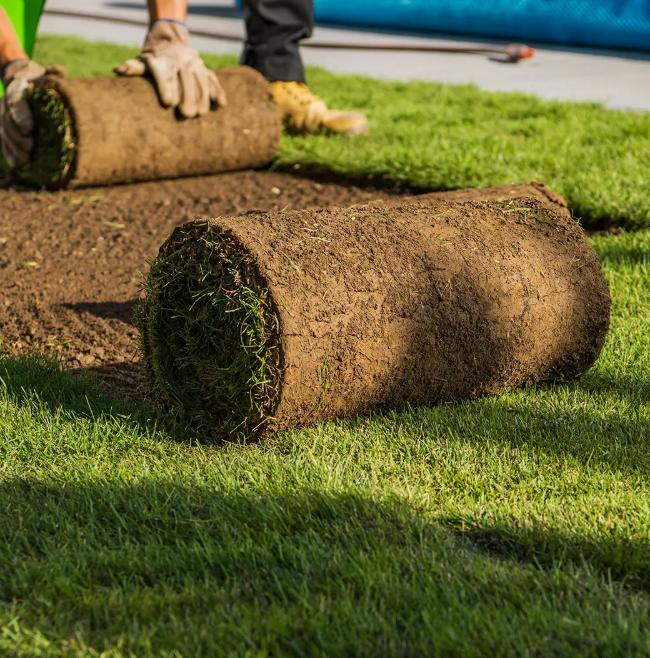
Sod is a layer of pre-grown grass sold in rolls or squares, complete with roots and a thin layer of soil. This allows for the instant installation of a new, lush lawn, as opposed to the time-consuming process of planting grass seed and waiting for it to grow.
- Grass blades: The visible green part of the grass.
- Roots: The established root system of the grass.
- Soil: A thin layer of dirt that holds the root system together.
- Biodegradable netting: Sometimes, a thin, net-like material is used to hold the roll together during harvesting and transportation.
Can I install sod myself ?
While it is possible to install sod yourself, hiring a professional sod installation service is recommended for optimal results. Professionals have the experience, equipment, and knowledge to ensure proper installation and establishment of the sod.
Whether you’re establishing a new lawn or revitalizing an existing one, sod provides a fresh and manicured look that can significantly enhance the visual appeal of your outdoor space.
With a well-maintained sod lawn, your property will make a positive impression. On this page we will give you the steps to do it yourself .
The best time to lay new sod
Sod can be installed spring through fall (and even in winter in mild climates). In areas of the country that favor cool-season grasses, like the Northeast, it avoids the problem of sprouting a nice crop of weeds when seeding a lawn in spring. And in southern states, which favor warm-season grasses like Bermudagrass, zoysia grass, and centipede grass, sod is the best way to cover the yard at any time of year, since these turf types cannot be grown from seed.
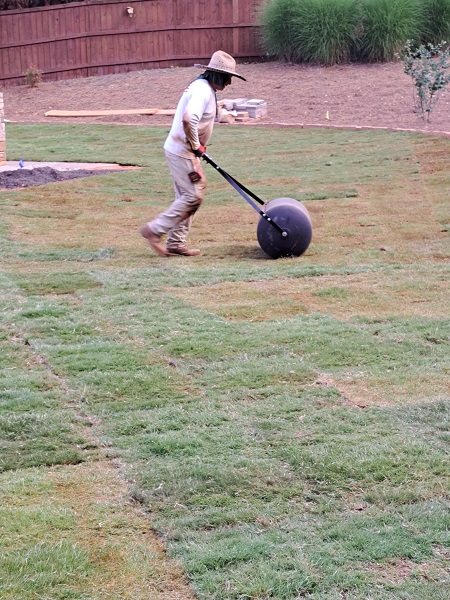
Prepare your soil for new sod
Loosen the top 6 to 8 inches of soil with a rototiller. Spread 2 inches of finished compost (this may be available for free if your town has a municipal compost center). Add 2 to 3 inches of sand to claylike soil to improve drainage. Till in amendments. Use a spreader to lay down the appropriate starter fertilizer, and then lime if needed.
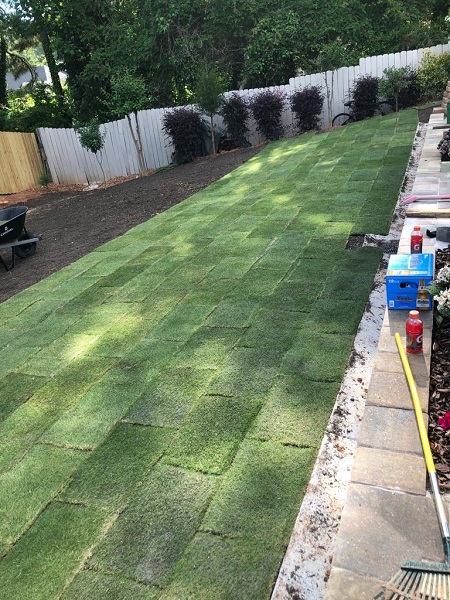
Lay the first row
Find the longest straight edge in your yard—here, it was the fence line. Unroll the first roll of sod along it. Keep off the sod while you are installing it, and rake out any footprints as you go. Smooth out loose areas or wrinkles, patting down the sod so it’s flat against the soil underneath it, with no air pockets.
Laying the next rows
After laying the first row, use the knife to cut off half of the next piece so you can stagger the short seams, as you would in laying bricks. Again, make sure to butt sections of turf snugly against each other without overlapping them.
Watering the sod
Water the installed lawn thoroughly, which also helps settle the soil. Try to keep foot traffic off the sod for a week. Water every day, preferably in the morning: During the heat of the day, you lose a lot of water to evaporation.
Fertilizing the new sod
Allow your lawn about three to four weeks’ growth, then feed it again with a starter fertilizer to make up for nutrients that washed away during the heavy watering schedule.
Mowing the new grass
When the grass reaches 3 inches high, it’s time to mow it down to 2 inches. Because your new lawn is still fragile, use a walk-behind mower (rather than the heavier ride-on type) for the first trim, and be sure to bag the clippings. Though you’ll probably want to grow it higher in the summer months—to encourage a deep root system and to shade out weeds—always aim to cut off one-third of the grass’s length anytime you mow, and be sure to use a sharp blade.
Call us for a free quote on sodding your lawn
Sod requires regular maintenance to thrive. This includes proper watering, mowing at the recommended height, fertilizing as needed, and promptly addressing any pest or disease issues. Following a consistent maintenance routine will help keep your sod healthy and vibrant.
The lifespan of sod depends on various factors, including the type of grass, climate conditions, maintenance practices, and usage. With proper care, sod can last many years and provide a beautiful and functional lawn. This is why you need a professional to lay the sod.

Contact Us for a Free Quote on
Sod Installation
- (470) 505-5430
- alex@architecturedesignlandscape.com
- Or fill out form and we will contact you